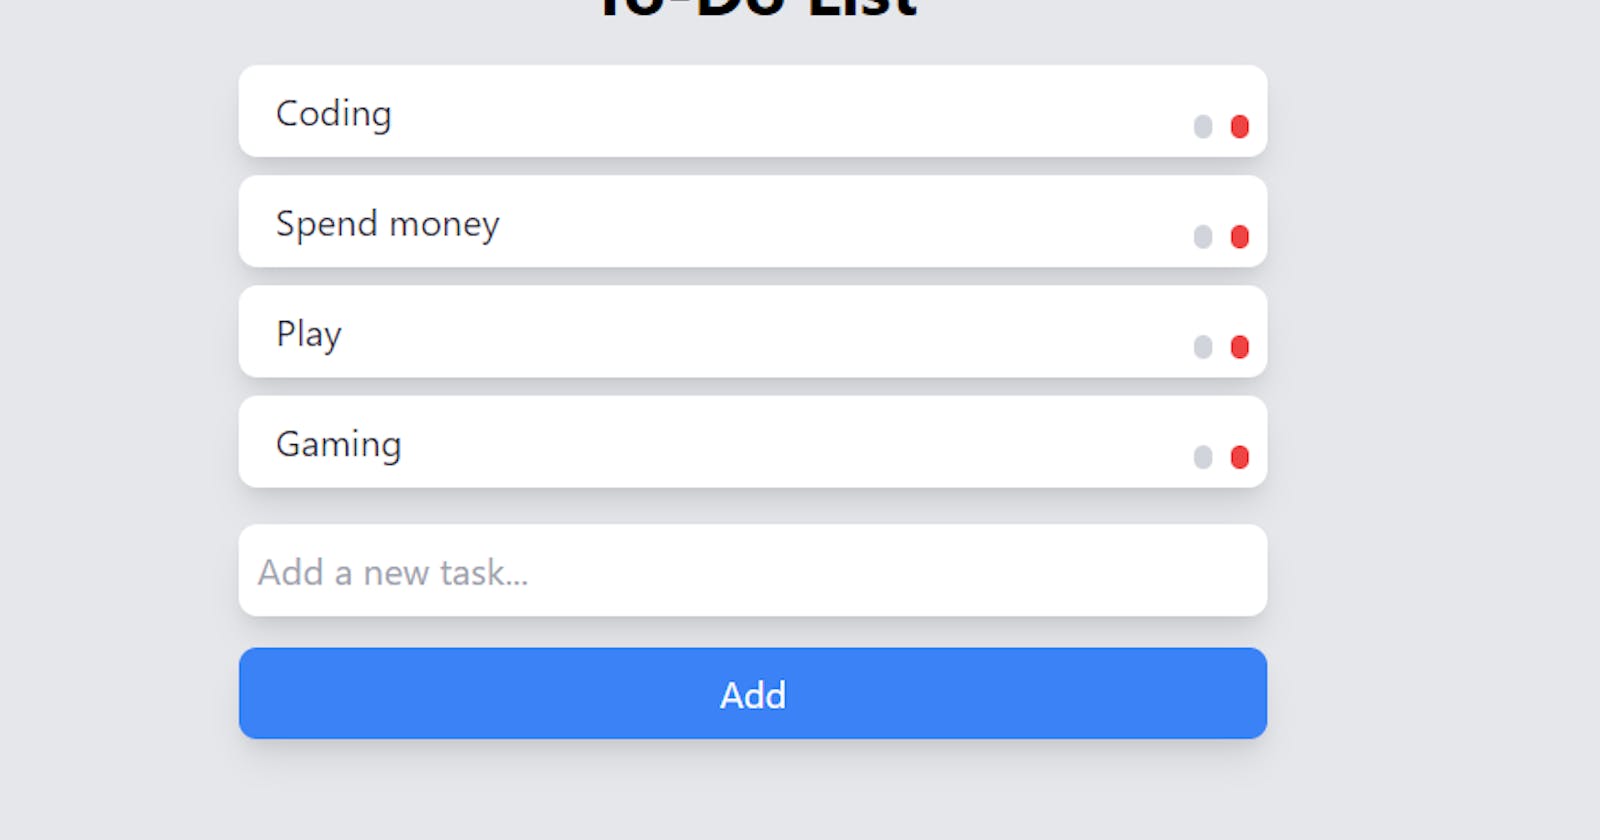
To-Do List Application with Tailwind CSS, and JavaScript
As a web developer, one of the first types of applications that I learned to build was a to-do list.


As a web developer, one of the first types of applications that I learned to build was a to-do list. These simple, yet powerful tools allow us to stay organized and on top of our tasks, making them an essential tool for anyone looking to boost their productivity. In this tutorial, I'll walk you through the process of building a to-do list application from start to finish using HTML, CSS, and JavaScript.
Step 1: Set up the HTML
The first step in building any web application is to set up the HTML structure. For our to-do list application, we'll need a few different elements:
A form for adding tasks
An input field for entering tasks
A button for submitting tasks
An unordered list for displaying tasks
Here is the HTML code for setting up these elements:
<h1 class="text-2xl font-bold text-center mb-4">To-Do List</h1>

<form id="task-form" class="flex justify-center mb-4">
  <input type="text" id="task-input" class="w-full p-2 rounded-lg shadow-lg">
  <button type="submit" class="p-2 rounded-full bg-blue-500 text-white">Add</button>
</form>

<ul id="task-list" class="mx-auto w-1/2"></ul>
Step 2: Style the application with CSS
Now that we have the basic structure of our to-do list application set up, it's time to add some style to make it look more modern and visually appealing. For this tutorial, we'll be using the popular CSS framework Tailwind CSS to help us quickly style the application.
First, let's style the form and input field to make them look more modern and inviting:
form {
  margin-bottom: 1.5rem;
  box-shadow: 0 4px 6px rgba(0, 0, 0, 0.1);
}

input {
  padding: 0.75rem 1rem;
  border-radius: 0.25rem;
}

button {
  padding: 0.75rem 1rem;
  border-radius: 0.25rem;
}
This will add some padding and a rounded border to the input field and button, as well as a box shadow to the form.
Next, let's style the task list to make it look more modern and visually appealing:
ul {
  margin-top: 1.5rem;
  box-shadow: 0 4px 6px rgba(0, 0, 0, 0.1);
}
li {
  padding: 0.75rem 1rem;
  border-radius: 0.25rem;
}
This will add some padding and a rounded border to the task items, as well as a box shadow to the task list.
With these styles in place, our to-do list application should now look more modern and visually appealing.
Step 3: Add functionality with JavaScript
Now that we have the basic structure and styling of our to-do list application in place, it's time to add some functionality to make it fully functional. We'll be using JavaScript to handle the following tasks:
Adding new tasks to the list
Editing existing tasks
Deleting tasks from the list
First, let's set up some variables to hold references to the different elements that we'll be interacting with:
const taskForm = document.querySelector('#task-form');
const taskInput = document.querySelector('#task-input');
const taskList = document.querySelector('#task-list');
With these variables in place, we can now start adding functionality to our to-do list application.
To add new tasks to the list, we'll need to listen for the submit event on the form and then create a new list item with the task content and add it to the task list. Here is the code for doing this:
taskForm.addEventListener('submit', function(event) {
  event.preventDefault();

  const taskContent = taskInput.value;

  if (taskContent.trim()) {

    const taskItem = document.createElement('li');
    taskItem.classList.add('task-item', 'flex', 'justify-between', 'p-2', 'rounded-lg', 'shadow-lg', 'bg-white', 'my-2');
    taskItem.innerHTML = `
      <span class="flex-1 ml-2 text-gray-800">${taskContent}</span>
      <button class="edit-btn p-1 rounded-full bg-gray-300 mr-2"><i class="fas fa-edit"></i></button>
      <button class="delete-btn p-1 rounded-full bg-red-500"><i class="fas fa-trash-alt"></i></button>
    `;
    taskList.appendChild(taskItem);

    taskForm.reset();
  }
});
This code will listen for the submit event on the form, and when it occurs, it will get the task content from the input field and create a new list item with the task content. It will then add the new task item to the task list and clear the input field.
With this code in place, we can now add new tasks to the list by typing in the input field and clicking the Add button.
Editing tasks
To allow users to edit existing tasks, we'll need to listen for the click event on the edit buttons and then replace the task text with an input field. The user can then edit the task text and click the update button to save the changes. Here is the code for doing this:
taskList.addEventListener('click', function(event) {
  if (event.target.classList.contains('edit-btn')) {
    const taskItem = event.target.parentElement;
    const taskText = taskItem.querySelector('span').textContent;
    taskItem.innerHTML = `
      <input type="text" class="w-full p-2 rounded-lg shadow-lg" value="${taskText}">
      <button class="update-btn p-1 rounded-full bg-blue-500 text-white mr-2"><i class="fas fa-check"></i></button>
      <button class="cancel-btn p-1 rounded-full bg-red-500"><i class="fas fa-times"></i></button>
    `;
  }
});
This code will listen for the click event on the edit buttons and, when clicked, it
Deleting tasks
To allow users to delete tasks, we'll need to listen for the click event on the delete buttons and then remove the task from the list. Here is the code for doing this:
taskList.addEventListener('click', function(event) {
  if (event.target.classList.contains('delete-btn')) {
    const taskItem = event.target.parentElement;
    taskList.removeChild(taskItem);
  }
});
This code will listen for the click event on the delete buttons and, when clicked, it will remove the task item from the task list.
With these three pieces of functionality in place, our to-do list application is now fully functional! Users can add new tasks, edit existing tasks, and delete tasks as needed.
Conclusion
In this tutorial, we learned how to build a to-do list application from start to finish using HTML, CSS, and JavaScript. We set up the HTML structure, styled the application with Tailwind CSS, and added functionality with JavaScript. With these skills, you can now build your own to-do list application or customize this one to fit your needs.
I hope you found this tutorial helpful! If you have any questions or comments, please feel free to leave them in the comments section below.